Gluten Free Pita Bread
Yeasty chewy pita bread with all the taste and none of the gluten!
Equipment
- Thermometer
- large mixing bowl
- Whisk
- Large Kitchen Spoon
- Kitchen Towels
- Plastic Wrap
- Heavy Frying pan
- spatula
Ingredients
- 3 cups Gluten Free Flour I used Bob's Red Mill, Gluten Free 1 to 1 Flour ( It may take less than the three cups)
- extra flour for the board and rolling pin
- 2 teaspoons active dry yeast 1 packet- 7 gram, 1/4 oz.
- 1 cup warm water between 115° and 105°
- 1 teaspoon sugar
- 2 teaspoons salt
- 2 Tablespoons olive oil
- Extra Olive oil for cooking
Instructions
Preparing the Yeast
- Heat the water slightly and use the thermometer to ensure that the temperature is between 115° and 105°.
- Add the sugar to the water and stir until it is dissolved.
- Add the active dry yeast to the water and sugar mixture and stir.
- Let the yeast mixture set for 10 minutes. It will be bubbly and foamy. If it isn't, your yeast is not good and you need to start again.
Preparing the Dough
- Pour the yeast mixture into a warm mixing bowl.
- Begin by adding 1/2 cup of the gluten free flour.
- With a whisk, gently mix the yeast and 1/2 cup of the flour until they are combined with no lumps. Take note that you may not use all three cups of flour.
- Continue adding the flour, 1/2 cup at a time. When the mixture is difficult to whisk, switch to a large kitchen spoon and continue to combine.
- Add the 2 Tablespoons of olive oil and the salt. You don't want to add it too early because salt can inhibit the yeast from growing.
- Continue adding the flour and mixing and kneading, until the dough forms a smooth ball. I usually end up using approximately 2½ cups of flour. It may differ depending on your flour so add the flour slowly and use your judgment.
- When it is difficult to stir the dough using the spoon, begin working and kneading it with your hands, to achieve a pliable moist ball. Be careful not to add flour to the point that the dough is dry looking.
- When the dough has formed a smooth ball, clean the bowl, and return the ball of dough to the bowl.
- Pour a small amount of olive oil over the ball, ( 2 teaspoons or so) enough to just coat the top of the dough. Turn the dough in the bowl so that all sides of the ball are coated.
- Cover the bowl with plastic wrap, and then place a clean kitchen towel over the top of the bowl.
- Place the bowl in a warm place for an hour in order to rise. I turned the oven on to its lowest setting (about 190°), then turned the oven off, and let the bowl rest sitting on the open oven door. Be sure to turn the oven off. Too high of heat will prevent the dough from rising.
- Let the dough rise for about an hour.
- After the dough has risen, gently push down the dough with your hands to release the air.
- Divide the dough into balls. Make eight if you would like smaller 4" pitas, or six if you'd like a larger pita.
- Place the dough balls into the bowl, cover with a clean kitchen towel, and let it rest for 10 minutes.
- At this point, you can refrigerate any of the pita dough balls that you don't want to cook immediately.
- Flour the board and rolling pin lightly so the dough will not stick.
- Take each ball and flatten it into a disc between the board and the heal of your hand,
- With the rolling pin, roll the flattened discs out until they are round and ¼" thick. Flip the disc over and roll the other side. Try to make sure that there is an even depth across the disc.
- You can smooth out the edges of the pita by placing one hand on the disc to hold it in place, and using the side of your other hand to even and smooth out the edges.
- After you have the dough rolled out, sprinkle the disc on both sides with a light coat of cornmeal, for texture and to prevent sticking.
Cooking the Pita
- Heat a heavy frying pan until it is very hot and a drop of water sizzles on the surface. Once the pan is hot, turn the heat down to medium heat.
- Lightly coat the pan with olive oil. I poured oil on a paper towel and used it to wipe down the pan.
- Wet your hand and lightly moisten one side of the pita disc. It will just be slightly moist, not wet.
- Place the moistened side of the pita down in the oiled pan and let it cook for 30 seconds. Bubbles should form on the top of the pita.
- After 30 seconds, flip the pita over and let it cook on the 2nd side for between 1½ minutes and 2 minutes. The 2nd side should be lightly toasted with dark spots.
- Then, flip the pita back to the first side and cook for another 1½ to 2 minutes.
- Remove the pita from the pan and place it on a plate covered with a damp kitchen towel. The damp towel will help keep the pitas soft and pliable.
- Repeat until you have cooked all of the pitas.
To Finish
- Option 1: If you would like to use your pita as a sandwich and want to make a pocket, choose a pita bread that has a lot of bubbling.
- Cut the disc in half, and with a sharp knife, carefully begin to open the slit. Please note that unless the pitas were rolled out with a perfect thickness across the disc, cooked at a perfect temperature, and had the perfect moisture content, you might not be able to open up the pita pocket. Achieving this comes with experience, Whether you can open them or not, they will still taste great!
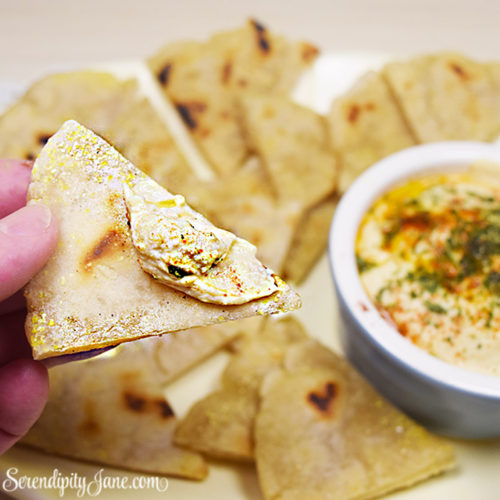
- Option 2: Cut the pitas in to wedges and serve as a flatbread with dip.
- Store the pitas in an airtight container in the fridge for up to a week. You can heat them in the microwave. It only takes about 20 seconds.
- Enjoy!